User Profile
When signed in, options appear at the bottom of the account users. See User Accounts to learn how to set up an account.
Manage Email List
Users who are signed in can share bookmarks by way of Facebook posts and email. When sharing by email you can pick recipients from a predefined email list and avoid having to remember or look up email addresses.
When you choose the “Manager Email List” option from the menu option the Maillist page will be displayed.
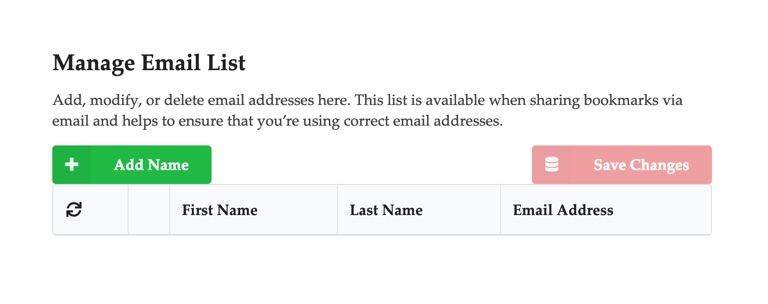
The table of email addresses will initally be empty. Notice that the “Save Changes” button is dimmed before changes are made. To add a new name press the “Add Name” button. This will display in input form allowing you to enter the name and email address of a recipient.
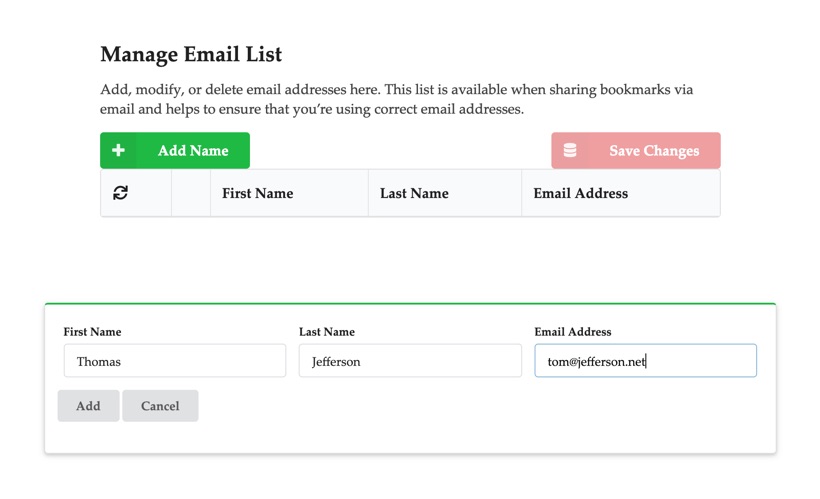
Enter a name and email address and press “Add” to add the name to the list. Notice that the “Save Changes” button is now active. Make sure to save changes before exiting the page. It is only necessary to save changes once no matter how many changes you make.
The input form stays active until you press the “Cancel” button so that multiple entries can be easily added.
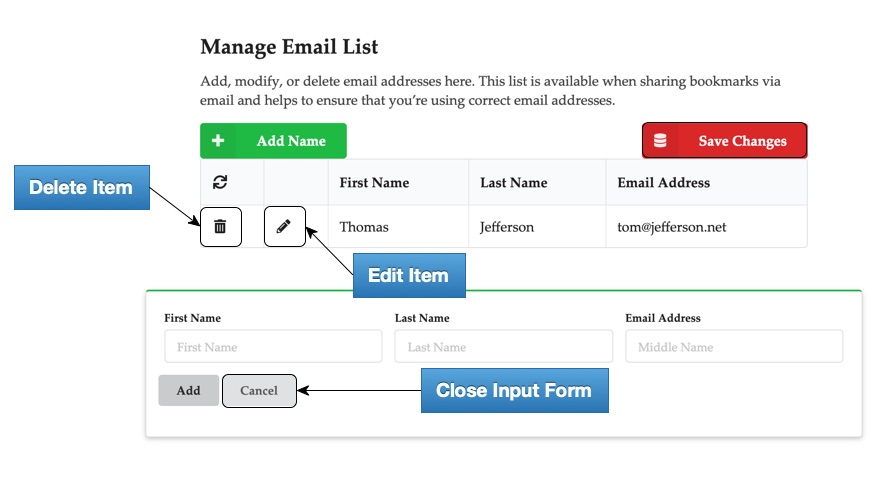
An item in the list can be deleted by pressing the button and edited by pressing the button.
Again, make sure to save your changes before exiting the page otherwise they will be lost.
Sharing bookmarks and quotes using the email list allows you to personalize messages when sending to groups. See the Bookmark documentation for more information.
Manage Topics and Create Quotes
Manage Topics allows you to edit or delete topics and display bookmarks by topic. This is a powerful way to group bookmarks by topic and consider the message of Christ Mind from a given perspective. The topics, of course, are defined by the user, and bookmarks too, so it takes some consideration to create good bookmarks.
This feature also allows you to define certain bookmarks as quotes that will be displayed as quotes on a teaching home page.
Page Description
There is a table for each source in the Library.
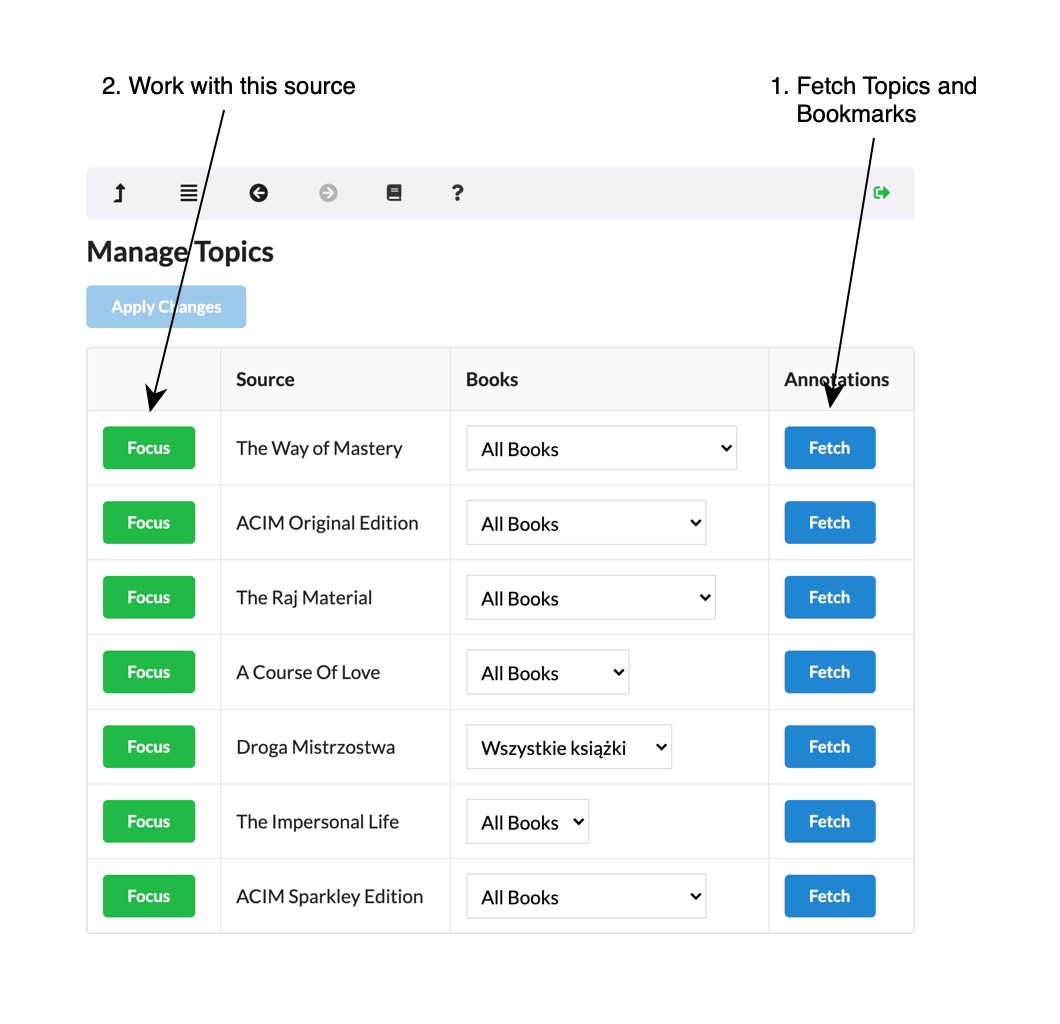
You can manage bookmarks from all sources. Start by clicking the ‘Fetch’ button for the source(s) of interest. This will fetch all bookmarks and topics for the source.
After the ‘Fetch’ is complete the number of topics and bookmarks is displayed.

Next click the ‘Focus’ button to operate on bookmarks and topics for the associated source.
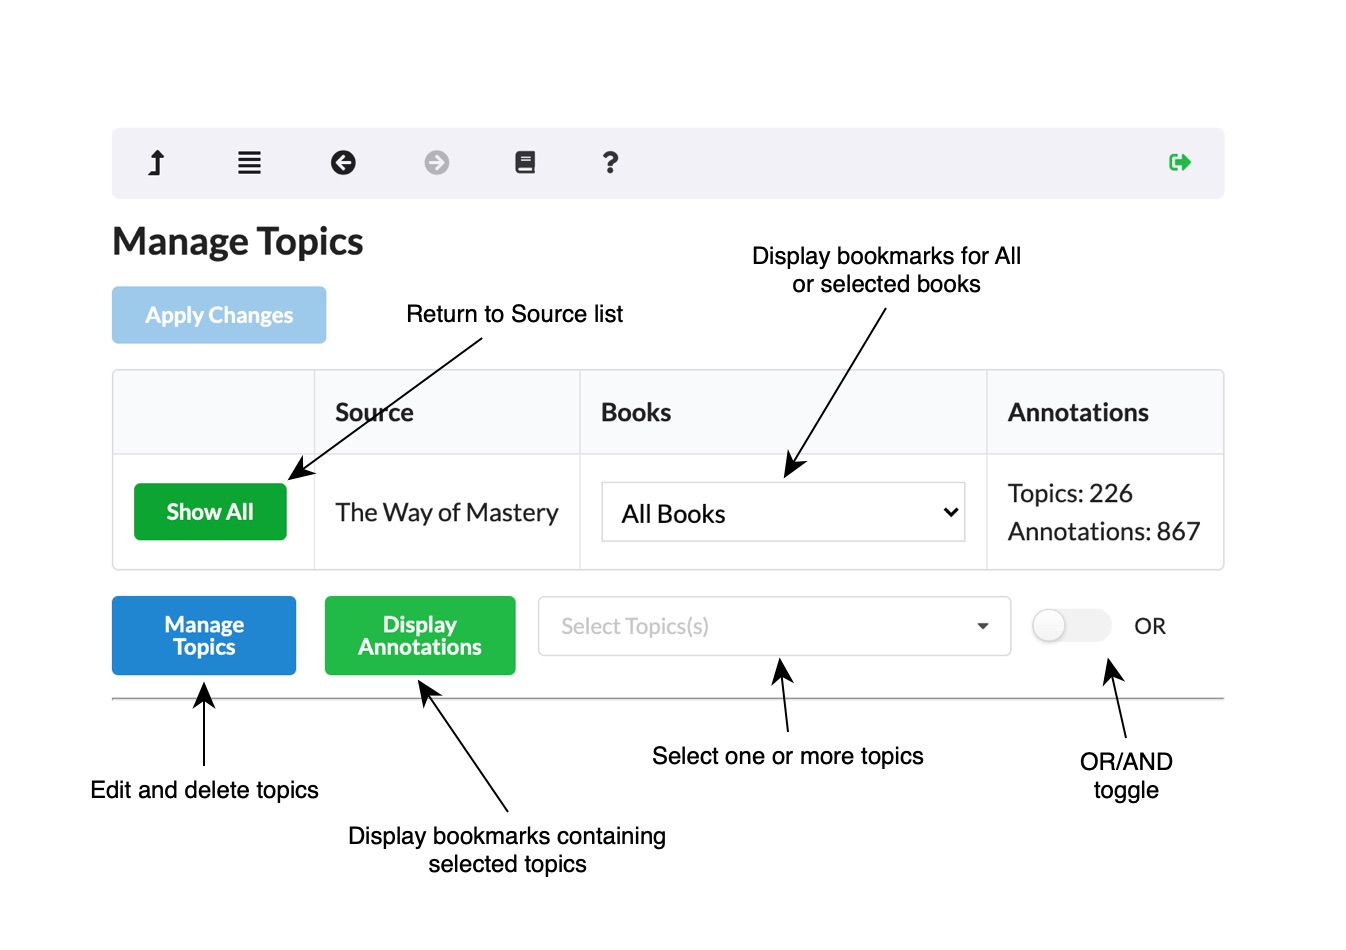
Focus hides all other sources and allows you to edit or delete topics and to display bookmarks by one or more topics.
To return to the list of sources just press the ‘Show All’ button.
To display bookmarks, select one or more topics from the dropdown list and press the ‘Display Annotations’ button. If you have selected more than one topic use the OR/AND toggle to indicate how you want topics to be treated.
When OR is selected (this is the default), a bookmark is displayed if it contains any one of the selected topics. When AND is selected, a bookmark is dispalyed if it contains each of the select topics.
You can limit bookmarks displayed to the one selected in the ‘Books’ dropdown. By default bookmarks for all books are displayed.
Topic Management
When you click the ‘Manage Topics’ button a list of topics is displayed. Use the icon to edit the name of the topic and the icon to delete the topic.
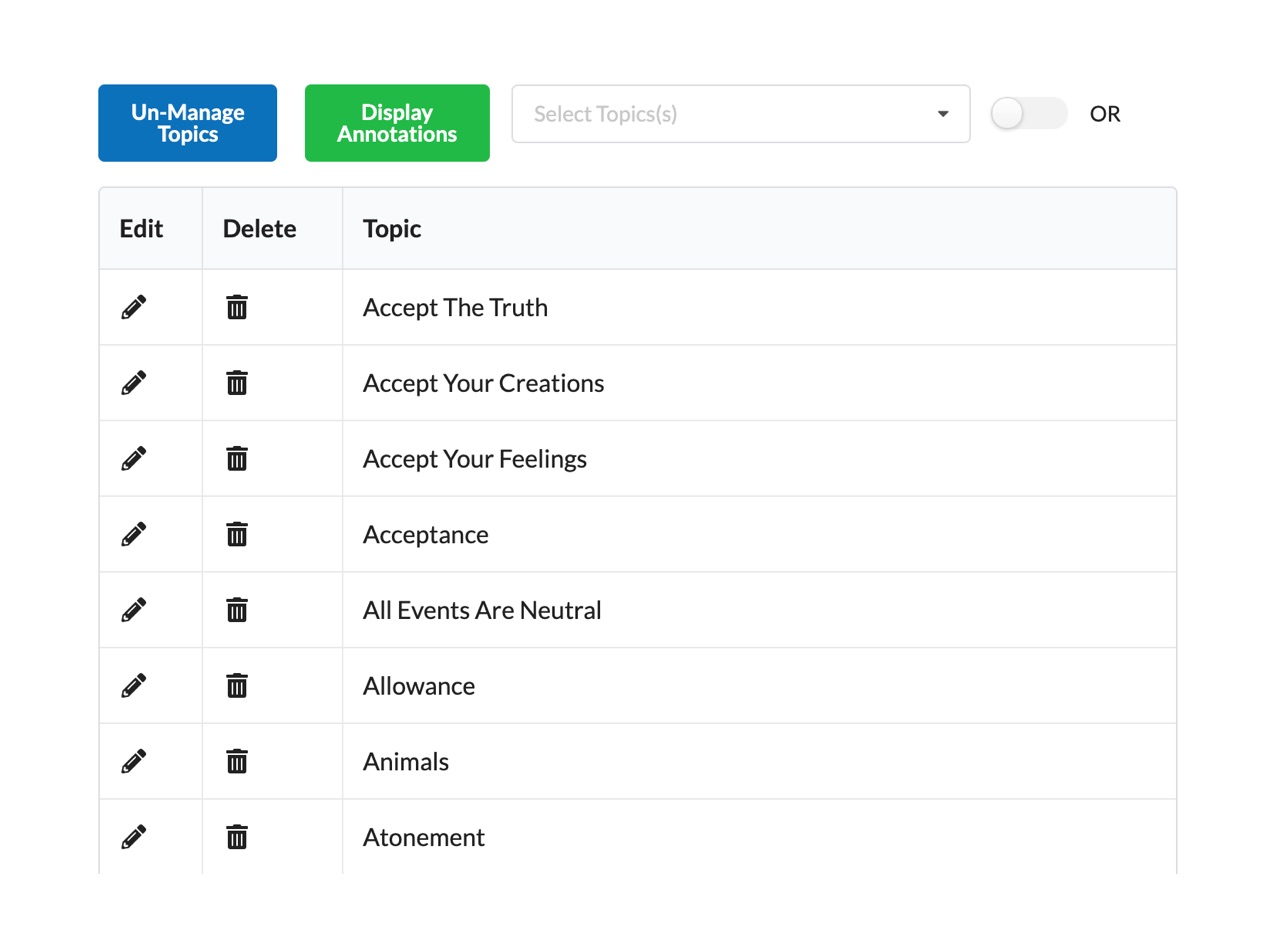
When you delete a topic it will also be deleted from all bookmarks that reference it. You will be asked to confirm your decision to delete a topic before it is deleted.
If you change a topic name or delete a topic you must press the ‘Apply Changes’ button to make the changes permanent. If you attempt to leave the page with changes pending you will be warned that leaving the page may cause you to lose data.
The Topic editor can be closed by pressing the ‘Un-Manage Topics’ button.
Display Annotations
This features allows you to query bookmarks by one or more topics. Select topic(s) from the dropdown menu and click the “Display Annotations” button.
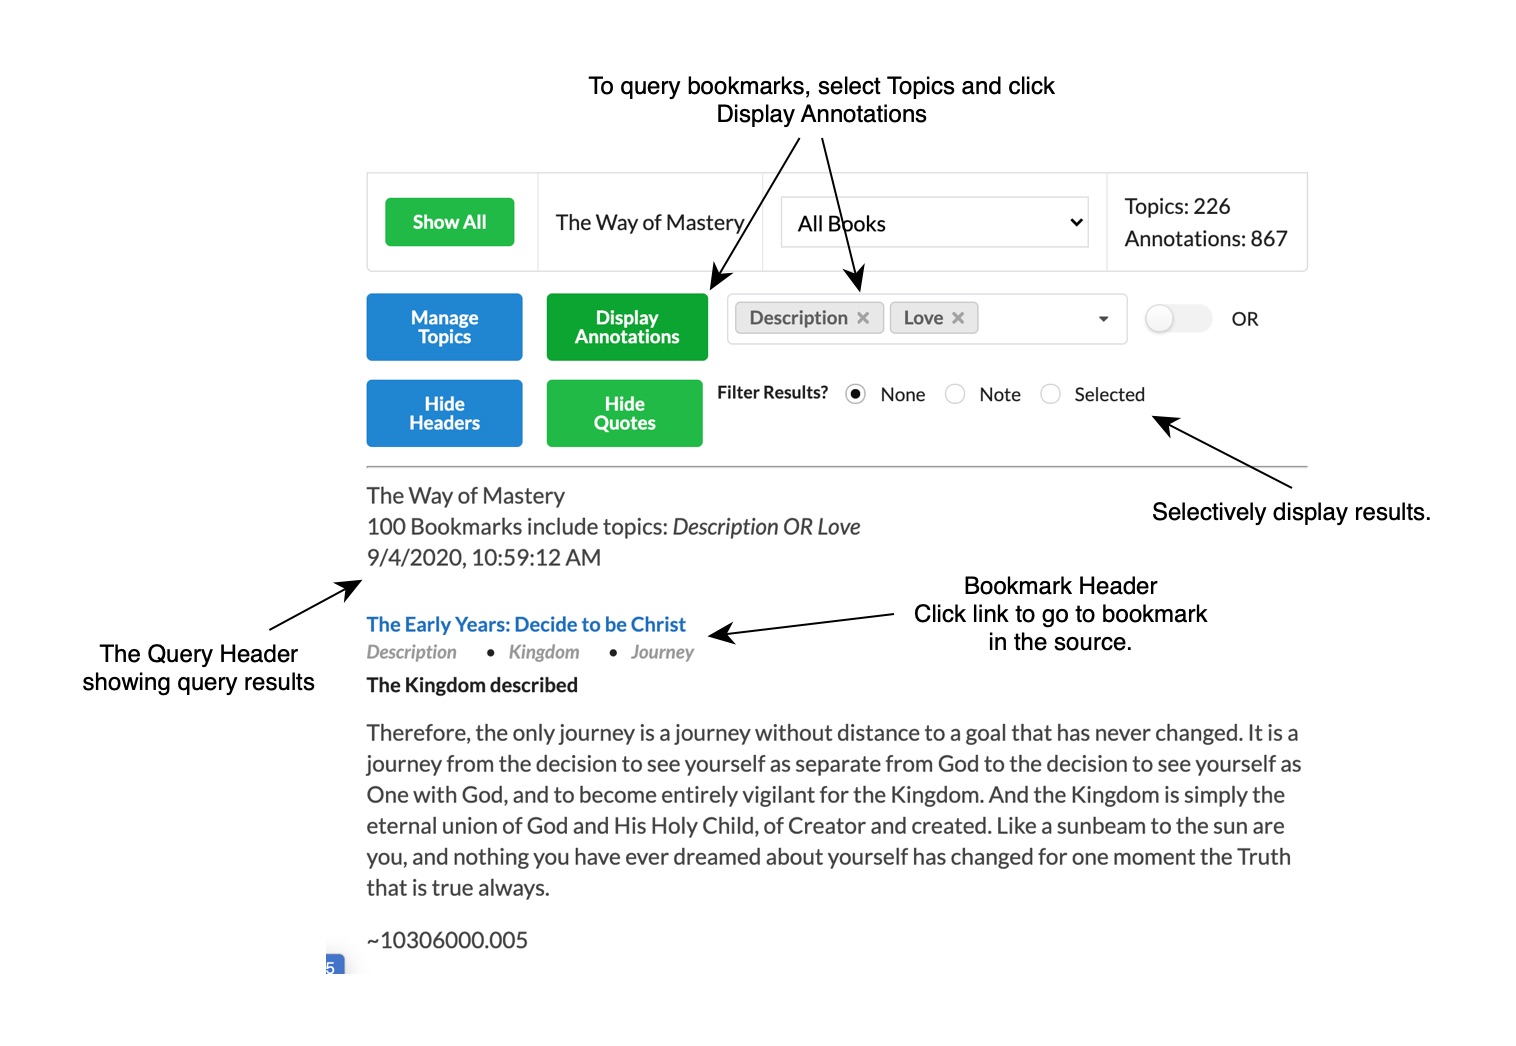
In this example there are 867 bookmarks for The Way of Mastery and we have asked to see those that contain either “Description” or “Love” topics. The query header shows that 100 bookmarks were found.
We could search for bookmarks containing both “Description” and “Love” topics by clicking the toggle to the right of the topic dropdown to change the condition to AND. Click “Display Annotations” again after you do this.
From the list of bookmarks displayed you can click the Book Title in the bookmark header to do directly to the bookmark in the source. This is handy if you want to make changes such as adding or removing topics.
You can also filter the results by bookmark type. The filter is disabled by default. Clicking “Note” will display only Note style bookmarks and “Selected” will display only Selected Text style bookmarks. This is useful when creating Quotes, described below.
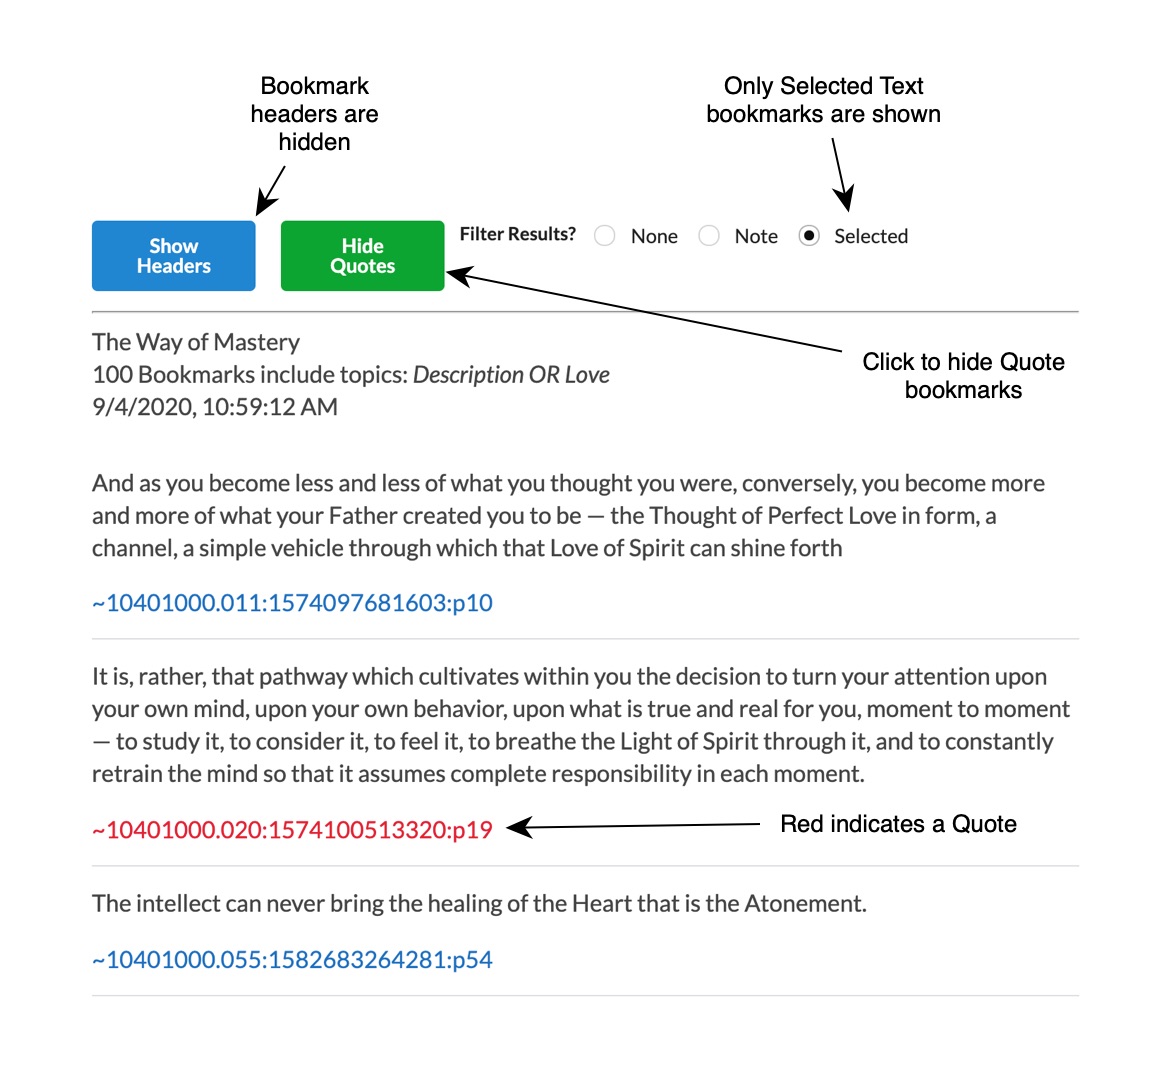
The image above shows only Selected Text bookmarks with the bookmark header hidden. Hiding the header makes it easy to copy bookmark text to another application. The number at the bottom of the bookmark indicates it’s origin and can be used as a citation.
When the number is shown in red, that indicates that the bookmark is a quote. All quotes are hidden when the “Hide Quotes” button is clicked making it easier to continue defining quotes.
Defining Quotes
Quotes are displayed on the home page of a source and can be shared to Facebook and by email. Quotes are defined from Selected Text bookmarks and not from Note Style bookmarks. There are CMI defined quotes available for several sources and more will be added and you can create your own quotes as well.
Here’s how to create your own quotes.
-
Define one or more bookmarks by selecting text from a transcript. Associate a topic with the bookmark to make it easy to find. ‘Quote’ is a good topic to use.
-
Go to the Manage Topics page and query bookmarks by the topic “Quote” or whatever topic you have used.

Here, bookmarks are filter by Selected Text so only bookmarks that from which quotes can be defined are displayed. And 54 existing quotes have been hidden from display as can be seen from the “Show Quotes” button.
-
To define a quote, click the “citation” link to display the quote editor.
-
You can edit the quote if needed so that it reads better as a quote. Just change the text as needed. Click “Add Quote” to save. The quote citation will display as red after the quote has been saved.

-
You can edit the quote by clicking on the red citation link.
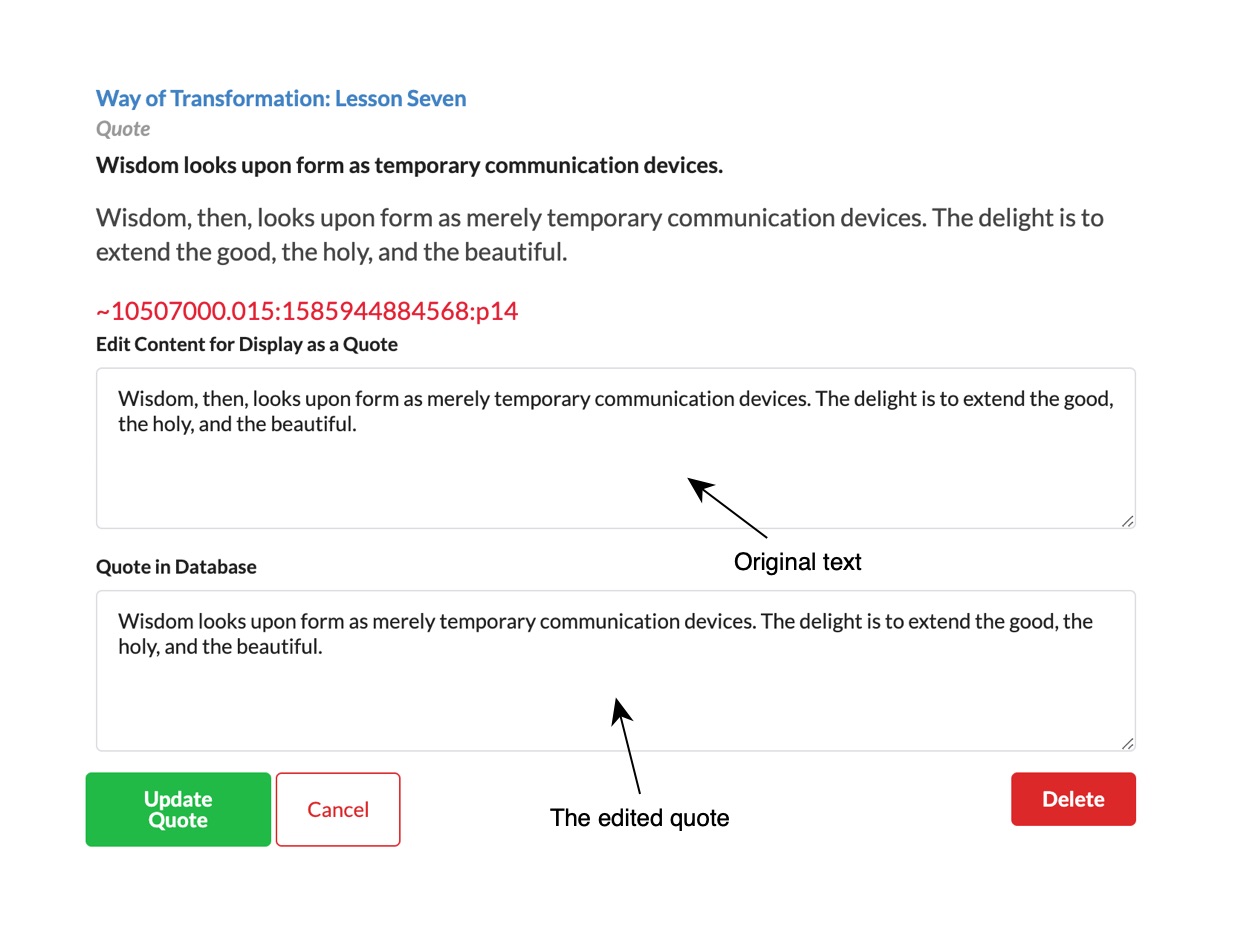
In this example the quote has been edited to remove “, then,” from the original text. The quote text from the database is shown in the second text box. This is not editable.
The original text from the transcript is shown in the first text box. You can change this text if desired or press the “Update Quote” button without editing to restore the original text of the quote.
You can also delete the quote entirely by pressing “Delete”.
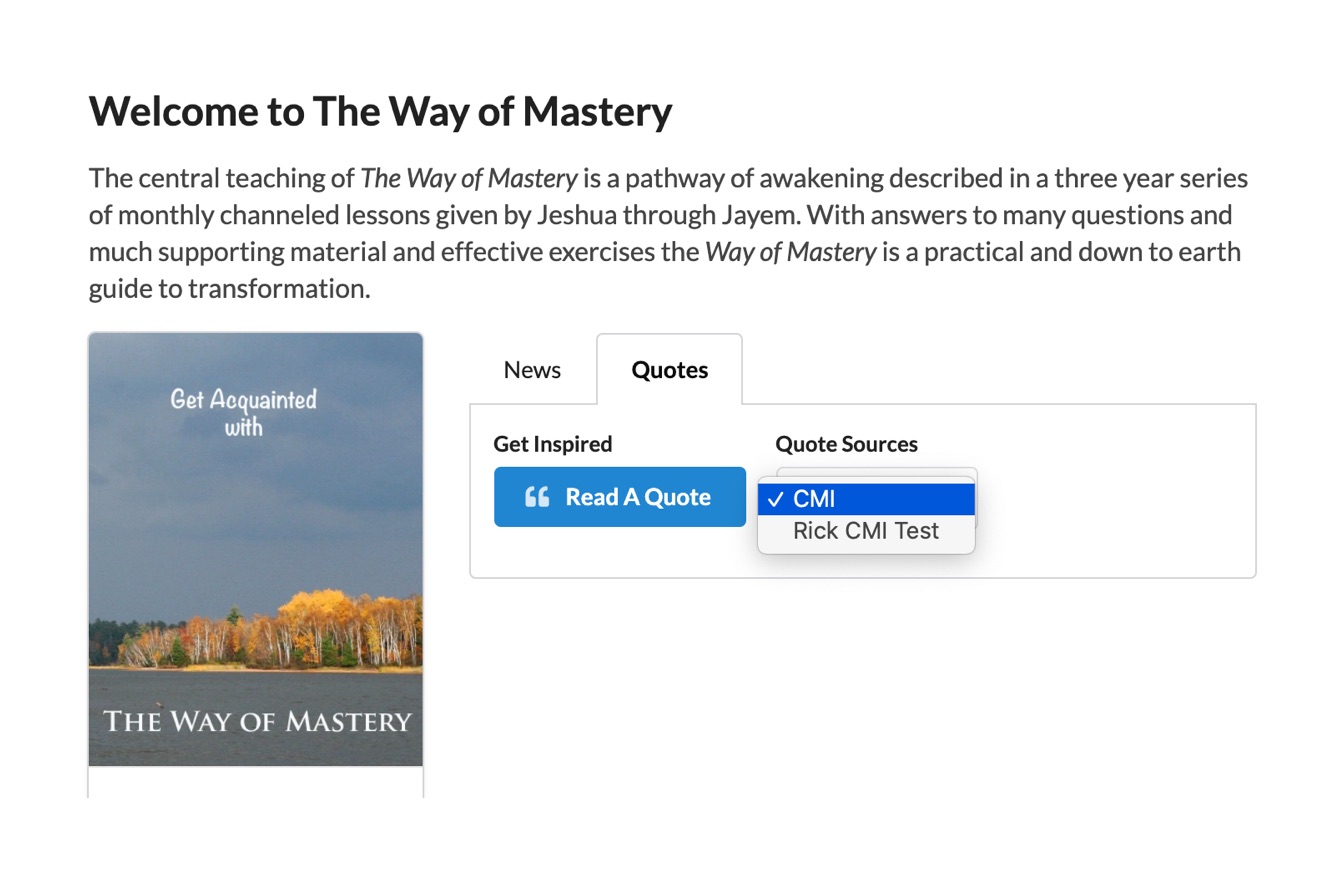
When you have created your own quotes, they will be available along with existing CMI defined quotes as shown below.